Baking: Chocholate chip cookies

I had been thinking about baking some chocolate chip cookies for quite some time now, and after reading a post about choc chip cookies at stirandstitch’s blog I thought it was time to go ahead and bake some using this new recipe in stead of my go-to choc chip recipe that I have been using for years.

Since it’s not always so easy to plan what to do and actually get to do it, on account of very cute baby girl, I didn’t get around to actually baking said cookies before today – but they were well worth the wait. 🙂

Choc chip cookies

I had to change the recipe a bit because they didn’t have the sugar I wanted at the store – and I am wondering about the baking soda in the recipe ??? usually I would use baking powder, so I used 1 tsp of baking powder in stead. (You usually have to double the amount when using baking powder in stead of baking soda – baking powder is actually half baking soda and half the acidic ingredient that you need to activate the baking soda.) Since there was no buttermilk or other such acidic ingredient I thought it safe to substitute; the baking soda would probably fail in the cookies on it’s own anyway. Also, the eggs I had was size medium and they looked fairly small for medium eggs too so I had to use 2 eggs in stead of one. I also chose to use two thirds 70% dark chocolate and one third milk chocolate. And lastly I used chopped almonds as a nutty ingredient.

Here are some photos of the baking of the cookies…

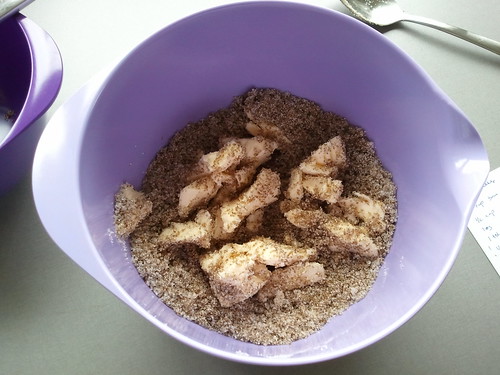
Two types of sugar before mixing with the butter

Choc chip cookies

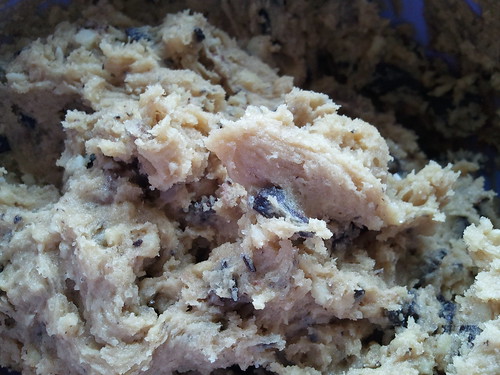
The doughy goodness after mixing everything together

Choc chip cookies

Before the oven..

Choc chup cookies

In the oven…

Choc chip cookies

After the oven…

Choc chip cookies

On a plate…

Choc chip cookies

And a close-up…

Choc chip cookies

The photos do not make the cookies justice – they are darker and yummier to look at in real life. They were very yummy to eat;slightly crisp on the outside and lovely chewy on the inside – just like I like them.

😉

Learning how to sew – 4th project: Lined tote bag

You might know this already, but I am trying to learn how to sew by following the workshops in the great book called ‘Sewing machine basics – A step by step course for first-time stitchers’.

It has been fun so far and I have learned a lot already; and now I’ve come to the 4th project, which is a lined tote bag! (You can never have too many bags, in my humble opinion.) 😉

I decided some time ago to use the same felt for the bag as I used for the scarf that I sew in the 2nd workshop of the book, and I am also using the same fabric as I used for the apron that I just finished sewing on the 3rd workshop of the book.

Bag

I think I am getting better at cutting in a nice neat line along the pattern paper.

And just look at how much fabric I have left over from that pretty apple/pear patterned fabric. (I might make a cute dress, from the rest of the fabric, for my baby girl when I have learned all the basics of sewing and feel more confident in tackling a dress pattern.)

Bag

And here is the lining for the bag cut out nicely:

Bag

And last, but none the less important – the interfacing…

Bag

I am so very excited about this project. It feels like a real challenge to have to line a bag and sew so many pieces together, but I like a challenge and I can’t wait to start sewing.

🙂

Bound-edged apron – a finished project!

I have finished my 3rd learning-how-to-sew project, and I am happy with the result!

Last time I wrote about the apron project I had already sewn the ties, but still needed to turn them right side out and attach them to the apron.

I struggled a bit turning the first one right side out, but figured out how to to it easy with the second one…

Apron


Then I pressed the ties and slip-stitched the ends shut. I am amazed… slip-stitching is like performing magic – you don’t see the stitches even though you are sewing from the outside!

Apron


Attaching the ties was actually more difficult than I had expected. The box stitches was very difficult to make look nice, and this was my first try at doing it, so I guess I shouldn’t have expected too much, but I had hoped for a nicer box.

Apron

Apron


But I can’t complain about the overall finished result….

Apron

Tadaaa…….! A finished apron = yet another finished project. 🙂


Next project is a bag, and I am really looking forward to the challenge.

Learning how to sew: The apron project, continued

The apron isn’t quite finished yet, but It’s getting very close!

I’ve bound all the edges, and it was maybe easier than I had thought it would be, but that’s just because I had thought it would be really difficult.

I started with the neckline edge…

Apron

As you can see the result could be neater, but for a first try at binding a rounded edge I’m happy.

Apron

Some of these photos are taken when I worked in the evening, so they are unfortunately a bit dark, but here is what it looked like when I had prepped the outer edge of the neckline for sewing:

Apron

Look at how neat the stitches are this time:

Apron

Yesterday I got some sewing done during daylight, so I took some photos when I put on the last of the binding around the lower edge;

Apron

Apron

Here the apron is all pinned and with basting stitches just ready to be sewn…

Apron

… and a close-up

Apron

Everything was going fine. This is a learning process for me and one of the things I notices was that I got a nice consisting distance to the edge of the binding if I used the rectangular holes in the sewing machine as guides for the fabric while having set the stitch type to a needle position with the needle to the side – here’s a close-up of it:

Apron


And then when I was so happy with my new discovery and thinking how great I’ve become at sewing . . . . .   the thread broke!

Apron

Ah well, I’m sure this happens for everybody sometimes, and I fixed it and continued and the result was fine.

Apron


All left to do now is the ties for tying the back of the apron, but that will have to wait for another day. 🙂

The apron gets a pocket

The apron project is all about learning to bind edges and apply pockets, so the apron has a nice big pocket with a bound edge plus the whole apron also has a bound edge too. To make it even more challenging, the pocket has rounded corners!

Baby girl went to sleep early yesterday, and husband was out for a work dinner, so I got my sewing kit out and started on giving the pocket a bound edge and then went on to apply it to the apron front.

I am somewhat pleased with the bound edge, but I might see if I can sew a bit closer to the edge next time. (It was a bit dark so the picture is not so good unfortunately.)

Apron

It was a bit tricky to get the corners rounded nicely, but it was a fun challenge.

Then I had to match the pattern on the pocket to the pattern on the apron front.

Apron

I think I got it matched quite well. Here is what it looks like in daylight:

Apron

I still have to take the basting stitches out, and I must admit that sewing in a consistent distance to a rounded edge is not easy. I guess I will have to practice that a lot more.

Apron

Next is to bind the whole edge of the apron. It has a curved edge too, so wish me luck!

Learning how to sew – 3rd project: Bound-edged apron

My next challenge is an apron and I am going to use this fabric…

Apron

I think it’s perfect for an apron. My extra challenge with this project is to align the front pocket so the pattern match!

Today I managed to trace the pattern and cut out the fabric…

Apron

Apron

Apron

I found it a bit daunting cutting the fabric, but I think I did just fine, look….

Apron

And then there’s the pocket…

Apron

I cut from the front of the fabric to make sure I got the pattern sequence that I want.

Still a lot of sewing to do, but that will have to wait for another day and another one of the baby’s naps.

Embellished scarf – a finished project!

My second learning-how-to-sew project is finished!

Look at how nice it turned out:

Scarf


Lessons learned and things I have to remember and get better at:

  • cut neater
  • sew in a nice straight line
  • finding and using a perfect matching thread colour
  • getting the thread tension just right

I used a chalk to trace the pattern on the other end of the scarf. It did not look nice when I used a ball point pen on the first end.

Sewing 2012-04-08


Here are a few more photos of the finished scarf:

Embellished scarf

Scarf

Scarf


The next project in the book is an apron!


Happy Easter!

Just a week ago it snowed again and I was so disappointed that the lovely spring weather had turned into winter. But now the sun is back and yesterday I ventured out into the garden to decorate a bit for Easter.

Easter 2012

This is how you decorate your garden for Easter in Sweden apparently, so when in Sweden I do as the Swedes – and it looks nice too.

Easter 2012

The eggs are just store bought ones, but I guess real ones wouldn’t last long outside in the wind and rain.

Easter 2012

They also put coloured feathers in the trees.

Easter

Easter 2012


And yesterday I also saw the first bumblebee of the year.

Spring

It’s a bit difficult to see becuse it’s covered in pollen, but it’s there!