Sewing: Ladybug pants

I am still very much in the process of learning how to sew, but I am taking a break from my Lined Tote Bag project until I get my hands on a new sewing machine, because I do not seem to be able to get the hang of sewing a 4 step buttonhole. 😦

I have been wanting a nice new machine for a long time, and am now in the process of selecting one that suits my needs within a reasonable price range. So far I am leaning towards getting a Janome DC2030.

– – – – – – –

So, I have cast my eyes on a cute pattern in the book ‘Cute clothes for kids’ by Rob Merrett. It’s a two piece set, but I am only going to make one piece: The Ladybug pants. 🙂

I recently bought some fabric from some German fabric vendor through their Swedish site: www.tyg.se – it looks like they have a big selection at affordable prices, which is great for a newbie sewer like me. And lucky for me, they have a fabric with ladybugs on it. 🙂

So here is my latest stash:

My latest stash

And a close-up so you really can appreciate the ladybugs…

Close-up of stash

I bought two colour variants of the ladybug fabric, but I think I’ll make them using the dark blue fabric and pair it with green. And then I’ll probably use the light lilac bias binding from my apron project.

Here is my selection for the Ladybug pants project

Fabric selection for pants

I’ve begun to trace the pattern and cut it out, but I am a bit confused about the line with the scissor symbol on it a bit further up the leg of the front and back piece of the pants. I am pretty sure I shouldn’t cut there, so for now I am just going to ignore it. It doesn’t say anything about it in the instructions. If you have a suggestion as to what it means, please do tell me about it.

Here’s the pattern:

Pattern

This will be my first time sewing something for my cute baby girl. I am crossing my fingers for a good result that she can wear.

🙂

Gardening: Radishes on the move

It’s not so bad getting up at 6 in the morning if the view outside your window is sunny and bright. This morning when I looked outside my window I saw this little fellow making his way towards my veggie patch.

Snail

I went out to take a photo of him and then noticed that things have started to happen in my veggie patch!

Veggie patch

Here’s a close-up of the action.

Close-up of radish sprouts

It’s a pity that it is too cold to sit outside, because it was absolutely a beautiful morning in my garden today.

Morning sun in my garden

Baking: Oat scones (a quick breakfast)

This morning I realised that we didn’t have any bread for breakfast in the house, and since I was quite hungry I wasn’t going to settle for ceraal with milk. I did a quick search on the internet and came up with the obvious answer: bake some scones!

My go-to recipe for scones have yoghurt in them, and we didn’t have any yoghurt either, so I couldn’t make those, but I found a recipe for oat scone that sounded nice and wanted to try it out. Problem was that it called for buttermilk, and for some reason, you can’t get buttermilk in Sweden. I usually substitute with filmjölk, but I also didn’t have that in the house, so I opted for just using regular milk instead. I don’t like raisins, so I left them out. And I am sure they will taste great with chocolate – have to try that someday.

ingredients:

  • 2 eggs
  • 2 tbsp acacia honey
  • 50 gram soft butter
  • 1 dl buttermilk
  • 250 gram all purpose flour
  • 3 tsp baking powder
  • 1 tsp cinnamon
  • ½ tsp coarse salt
  • 50 gram rolled oats
  • 50 gram  raisins

Whip eggs and honey together

Oat scone: ingredients

Then stir in milk and butter and add the rest of the ingredients and combine well.

Oat scones: dough

Roll out to 1,5 cm thickness and cut out approx. 12 scones using a cutter or a glass.

Oat scones: Before oven

Brush with egg before baking in a 200 deg. C preheated oven for 10-12 minutes.

Oat scones: ready to eat

Serve hot or cold with your favourite scone topping.

Oat sones: plated


These turned out tasty even though I didn’t use buttermilk. I think I will try them with a bit of chopped dark chocolate in the dough next time.

🙂

Crochet: Baby blanket

My daughter was born last year in September, and while I waited for her to great the world I crocheted a blanket for her. I wasn’t much of a blogger back then, so when I put my baby girl down for her nap the other day, I started contemplating about bragging a bit on my blog about this lovely blanket that I crocheted.

I made it up as I went along, and I didn’t write a pattern recipe down, but I think it’s:

  • beginning with a row of single crochet
  • then alternating 2 double crochet (American dc) with 2 single crochet, followed by a row of single crochet and this repeated four times. (repeating this step after main part of blanket)
  • The main part of the blanket is made with half double crochet along a row and then next row single crochet in front loop (or maybe it was the back loop?), then repeat that through with a change of colour after 5 repeats.
  • The edge is some sort of shell stitch. I guess I could look at the blanket and see what I used, but I just but baby girl to sleep for the night and the blanket is in her bed.

Anyway, now for the bragging part…. the nice pictures of my wonderful blanket

Baby blanket

Baby blanket

Baby blanket

I used this yarn:

baby blanket crochet in progress


I am really satisfied with the result. It has been much used and will probably be loved for years to come.

🙂

Food/baking: Pizza – a dinner that you bake

I like to cook, but I love to bake, so I guess pizza is a win win for me. Also, when making pizza I get to use two of my favourite kitchen utensils!

My favourite pizza dough recipe is from a Swedish cook book called ‘one more slice’ by Leila Lindholm. The recipe says it’s for 4 big pizzas, but I get 2 from it for some reason. I guess I like my pizza a bit thicker. 😉

ingredients:

  • 15 gram fresh yeast
  • 3 dl lukewarm water
  • 2 tsp sugar
  • 1 tsp salt
  • 2 tbsp olive oil
  • 1 dl durum wheat flour
  • 5 1/2 to 6 dl high protein wheat flour

Here is how it went when I made pizza for dinner this evening:

Set the oven to 250 deg. C

The recipe says to make 4 big pizzas and bake for 5 minutes. I make 2 and bake for 12 minutes.


I love it when I get the perfect amount in the first weighing

Pizza

Yeast crumbled in one of my favourite kitchen utensils…

Pizza

My Kenwood mixer! – I use cold water from the tap and then warm it in the microwave to avoid yucky warm water from the tap.

Pizza

Two types of flour

Pizza

After mixing water and yeast, the rest of the ingredients are mixed – flour added a bit at a time. Mix for about 10 minutes until dough is nice and elastic.

Pizza

– I heart my Kenwood mixer –

Pizza

The dough is set aside to rise to double size; takes about 45 minutes

Before:

Pizza

After:              (notice one of my other favourite kitchen utensils – a dough scraper thingy)

Pizza

Prepare the topping. (I went for a simple version using left over tomato sauce and two types of cheese.)

Pizza

Before the oven:

Pizza

In the oven:

Pizza

After the oven:

Pizza


I could have taken a photo of the pizza nicely plated, but actually it hardly hit the plate before I had devoured it. Yum yum yum!

😉

Gardening: The slow way to vegetables

I have never been good with plants, and probably never will be, but I do like to have some growing green things around me so I try to keep what I have in my house alive as best I can.

Last summer we bought a house with a small garden. There aren’t much growing in it so it’s perfect for my husband and me to slowly get the hang of maintaining a garden. There was a tiny vegetable patch where the former owners had grown carrots, so I thought I would try and grow something there myself this season.

It’s difficult to get much done when I only get to be creative while the baby takes a nap, so gardening is something done over several days for me. Some weeks ago I got rid of the old carrots in the ground and weeded away the worst of the unwanted stuff growing in my patch. I noticed that the carrots were small and chubby which probably was on account of the soil being rather clayey, so when I got to do some gardening today, while baby girl took a nap, I began by digging around in the patch to turn the soil. I am absolutely winging it with my grow-my-own-veggie project so if any gardeners are reading this feel free to comment and or give advise.

It’s a very small patch so I had decided on only growing two small veggie things this season and have chosen radishes and spring onions. Unfortunately baby girl woke up before I started to put in the seeds, so I ended up just spreading the seeds around in stead of spacing them evenly – I am hoping I can make up for this later by removing any sprouting green thing that comes up and try to compete with it’s neighbour.

Here is my little veggie patch project:

Gardening

Hopefully I can blog about little green things sprouting their way towards the sun soon.

😉

Baking: Brownie cups

Some time ago I tried this recipe from allrecipes.com and they turned out amazing; just look at how yummy they were:

Brownies

Then shortly thereafter I wanted to recreate these perfect brownie treats, but alas they turned out more like chocolate cake than brownies. 😦

They were still nice too eat, but not the heavenly chewy chocolatey brownies that I had been looking forward too.

I wondered what went wrong and wanted to try again, but I find it difficult to find the time to bake with a baby in the house, so time went by and not until yesterday did I try to bake them again.

Here is how it went…

Melting the butter and chocolate

Brownie cups

The recipe says to combine sugar, eggs, flour and vanilla, but I decided to whip sugar and eggs to a creamy white fluff before adding the flour and vanilla.

Brownie cuås


Adding nuts to the melted butter/chocolate (I used almonds)

Nrownie cuås


The recipe was for 18 cups, but I had batter left even after filling 18 cups with slightly too much batter, so not to self is to fill them less. Trouble is that they take 35 minutes to bake and that seamed like too long too wait for baking just 6 more cups so I threw out the left over batter.

Brownie cups


The finished brownie cups warm and ready to eat!

Brownie cups


My verdict is that they were not as good as my first try, but better than my second try. I know where I went wrong this time. I hadn’t bought the perfect chocolate and just used what I had in the kitchen which was a 44% chocolate. I would definitely recommend a higher percentage chocolate like say 70%. And then I think I left them in the oven for a few minutes too long, but that is something you get a feeling for with a recipe the more you use it.

The bag is almost finished!

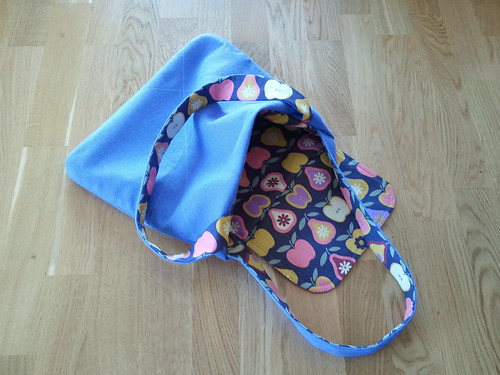
I have taken the time to sew quite often these past few days, and now the bag actually looks like a bag,  but is not yet totally finished – I still need to add buttons and their holes!

But to get this far I had to do a lot of pinning, basting and sewing – and along the way I made a few mistakes, because let’s face it: I am still learning how to sew. 😉

Last time I blogged about the bag project I had only cut the fabric and hadn’t done any sewing. That was just step 1 out of 12 – now I will tell you how I made my way through step 2 to 11.

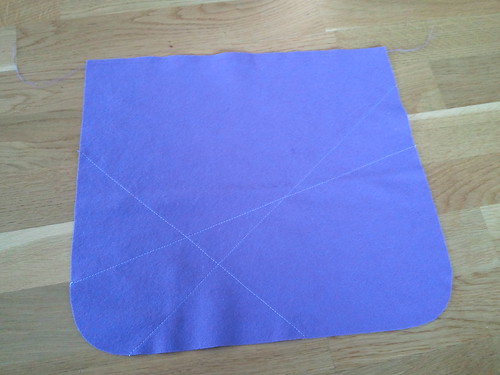
I stay-stitched across the top of the felt bag pieces and flap and the ends of the straps. I had never heard about stay-stitching before so this was a new thing learned. Then I top-stitched a fancy line pattern to the front piece of the bag.

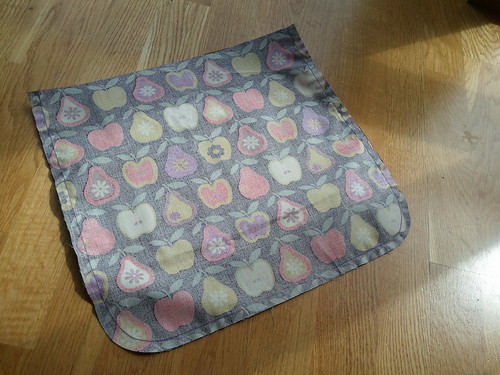
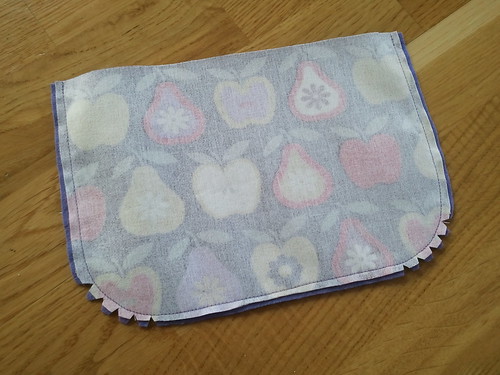
After turning flap right side out, I pressed the seams flat and top-stitched around the edge approx. 6 mm in.

Bag

The pattern has a fancy line pattern that you top-stitch across the front.

Bag

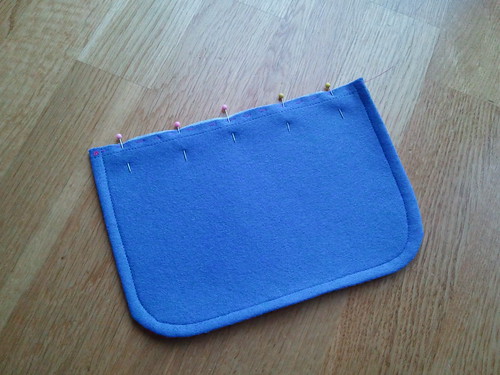
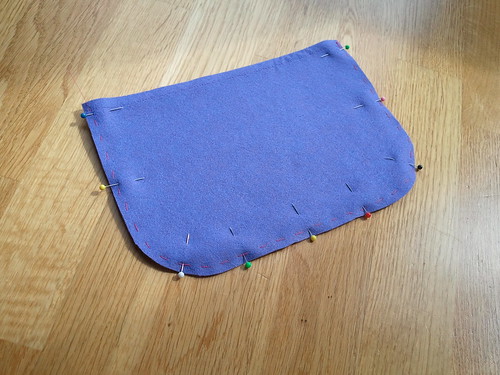
Next the felt bag pieces was sewn together. As always first pin and baste…

Bag

The book tells you to sew the seam twice for strength. This is another sewing tip learned. Then remember to notch the rounded corners after sewing.

Bag

Next turn right sides out and press seamed edges flat. Tadaa.. so far so good. 🙂

Bag

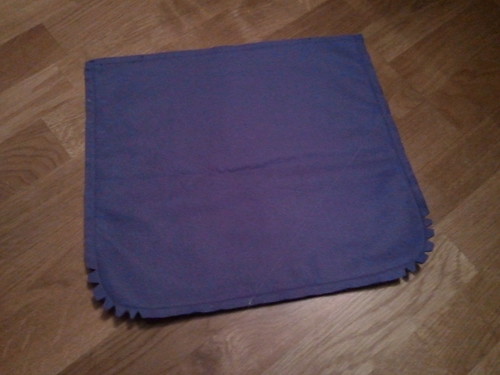
Then I repeated the steps for the outer felt fabric with the lining fabric.

Bag

The twist is to remember to leave an opening at the bottom so you later can turn it right side out after sewing it together with the outer layer. I did remember to leave an opening, but I forgot to notch the corners. Luckily I remembered at a later stage, so no actual fault was made here.

Bag

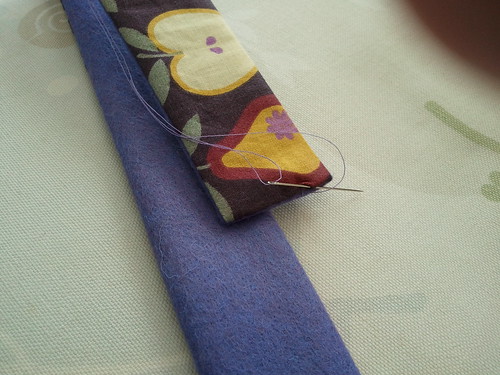
Then it was time for the flap. First I ironed on the interfacing to the lining. This was my first time ever ironing on interfacing, so I learned to do something new again!

Bag

More pinning and basting…

Bag

And voila! The flap is sewn together. Here I learned how to do layering: trimming the seam allowance to reduce bulk.

Bag

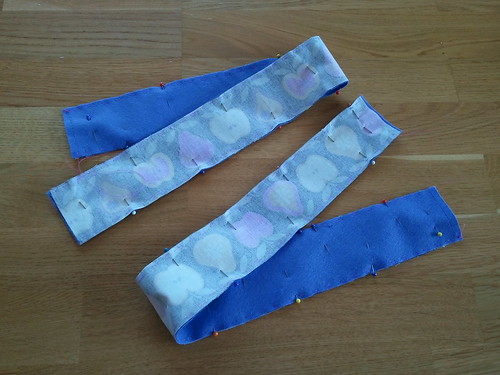
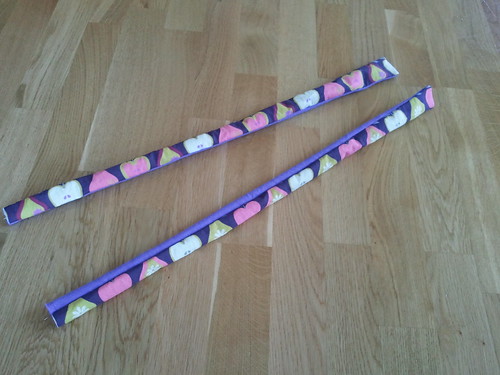
The I moved on to do the straps…. and I began making mistakes. 😦

Can you see what I did wrong here:

Bag

I didn’t put the right sides together. I actually pinned and basted both straps before noticing. Luckily I hadn’t begun to machine sew before I could correct my mistake.

Here is what it should have looked like:

Bag

Then the book tells you to sew down both edges and then to also sew across one end before turning the straps right-side out.

Bag

Bag

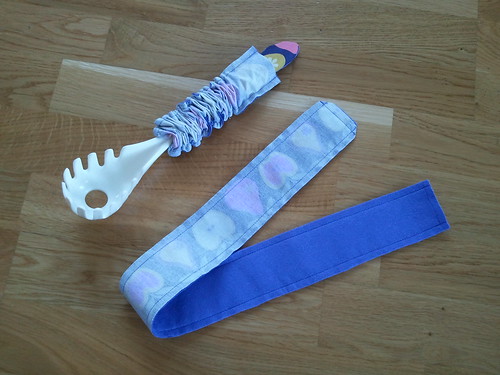
And then I made my second mistake! I didn’t read the instructions carefully enough, because if I had, I would have unpicked the end stitching, but to make matters even worse I begun to slip-stitch the other end, and managed to to this very nicely to both straps before realising the error I had made. 😦

Bag

The lesson I learned here was that you only sew the end of the strap to make it easier to turn right-side out. It is just to aid you, so remember to unpick the stitches afterwards, otherwise you will have too much and unnecessary bulk at your seams.

I unpicked both ends of both straps and continued on with step 9 which is to attach straps and flap to the outer layer of the bag. As always: pin, baste and sew.

Bag

Step 10 is to attach the lining. It was here that I noticed that I had forgot to notch the lining around the corners, but better late than never.

Bag

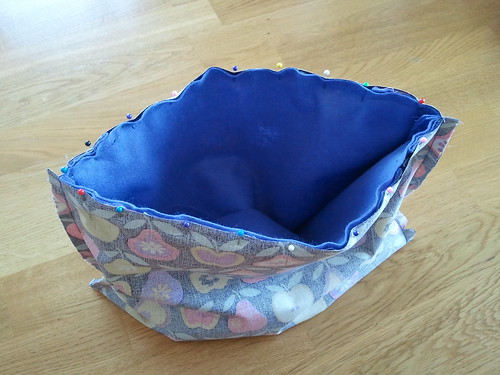
You sew the seam twice for strength and then layer the seam allowance.

Bag

Now the bag actually began to look like a bag, because now I turned the bag right-side out through the gap left in the bottom of the lining.

Bag

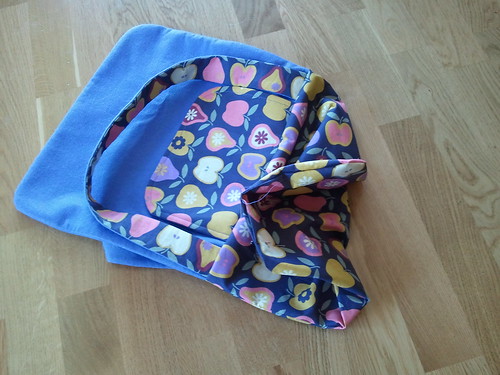
And then I got to slip-stitch the gap shut. I really do like to slip-stitch; it feels like I am performing magic each time. 😉

Bag

And this how far I am with the bag project now. But…. I have just noticed one more mistake! And again it has to do with the straps. I forgot to top-stitch down the edges after turning them right-side out. And now they are already sewn on the bag with lining and all, so I will see if it is possible to do as an afterthought. otherwise I will have to leave it as it is, and none but me and the few that read my blog will be the wiser. 😉

Bag

Next and last step to this project is buttons. I have never done buttonholes before, so wish me luck!

🙂